Forming .300 Blackout Brass
The 300 AAC Blackout (abbreviated 300 BLK) cartridge was introduced by the Advanced Armament Corporation as a .30 Caliber cartridge intended for use in the AR-15 platform. When loaded with 110gr to 125gr bullets, the 300 BLK achieves energies similar to the 7.62×39mm cartridge. In places where a suppressor is legal, the 300 BLK can be loaded to subsonic velocities with heavier (190+gr) spitzer-style bullets, which are much more efficient than the pistol bullets normally used in these applications.
The 300 Blackout rapidly gained wide acceptance due in large part to the fact that the cartridge uses standard AR-15 magazines (at full capacity), as well as the standard AR-15 .223/5.56 bolt and bolt carrier. In theory, conversion from .223/5.56 to .300 Blackout requires only a barrel change.
Brass cases are available from several manufacturers, or they can be formed from trimmed and necked down (yes, "down" - we'll explain later) .223 parent cases. Given the ready availability of .223 brass, many reloaders find it more economical to form their own .300 Blackout brass. This article will examine that process, which consists of four or five steps depending on how you decide to trim.
Step 1 - Case Selection and Inspection
Don't dive into your brass bucket and start randomly trimming those range pick-ups just yet. If you're going to make your own .300
Blackout cases, the initial parent case selection is very important.
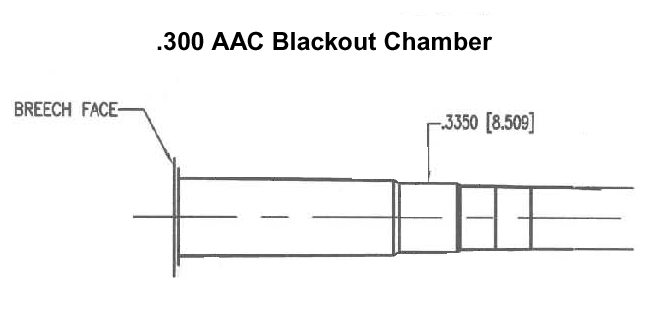
You can save yourself quite a bit of time and effort if you use only cases with the proper wall thickness. Take a look at the chamber drawing in Figure 1. Notice that the diameter of the chamber at the location of the case neck is 0.3350". Since the bullet has a maximum diameter of 0.309", that leaves only 0.026" of total space available for the brass. There should be about 0.002" of total clearance around the neck for reliable feeding, so the maximum case wall thickness is about 0.012". Keep in mind that 0.012" leaves almost no room for irregularities in case concentricity, so in reality you're better off with cases that are slightly thinner than this; a 0.0110" to 0.0115" wall thickness is just about perfect.
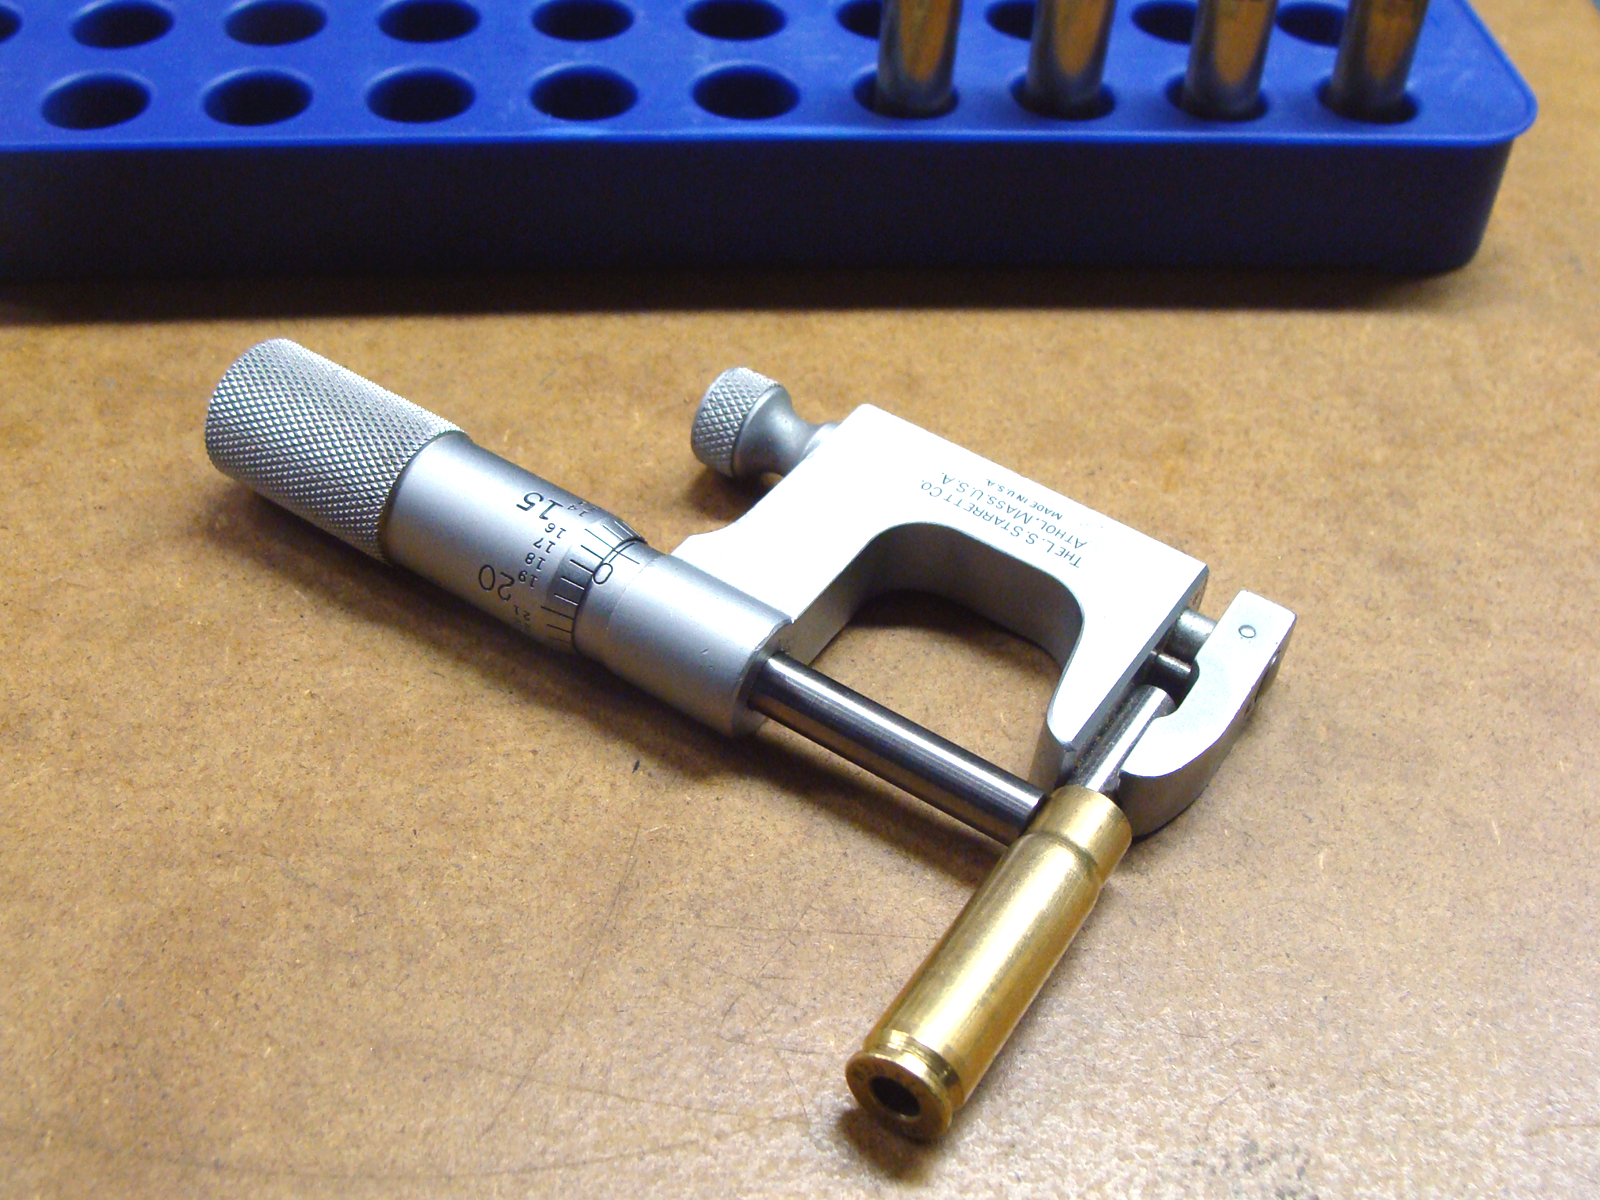
A dial caliper is not accurate enough to reliably measure case wall thickness, so I used a precision instrument called a tube micrometer (see Figure 2) to measure the wall thickness of a sample of .223/5.56 brass with various headstamps.
I used three cases of each headstamp; then, trimmed, chamfered, deburred, sized, cleaned, and measured them at the neck with a tube micrometer. The results are shown in Table 1.
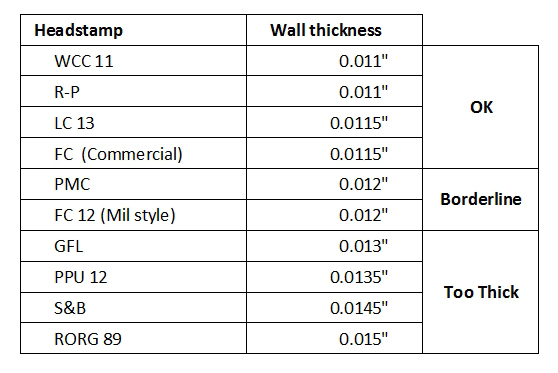
WCC, Remington, Lake City, and commercial Federal brass can be safely used to make .300 Blackout cases. PMC and military-style Federal cases with the FC 12 headstamp can be used, but may result in feeding and/or accuracy problems in tighter chambers. The other headstamps are too thick to be used as is. If you wish to use the thicker brass to make .300 Blackout cases, you must turn the outsides of the case necks to reduce the diameter. Google "Outside case neck turning" for an overview of the process. It's not trivial.
Step 2 - Trim the Cases
Case trimming normally involves shaving a few thousandths of an inch off of each case to either uniform the lengths or to bring
stretched cases back into spec. It's a much different affair in the context of making .300 Blackout brass. To make .300 BLK from
.223 Remington, the case has to be shortened by nearly 0.400". While it is possible to remove this much material using a conventional
hand-cranked or powered trimmer, doing so can be quite time consuming.
Many reloaders use a small cutoff saw to remove most of the brass, and later clean up the cut with a conventional trimmer. If you go to YouTube.com and search on "300 Blackout Case trimming" you will see dozens of methods, jigs, and tools that reloaders have employed to perform the task of shortening .223 cases - including the method I settled on.
I wanted to find a way to complete the trimming in a single step, rather than doing a rough cut first, and then a final trim after sizing. I opted to use a Forster Powdered case trimmer (see Figure 3).
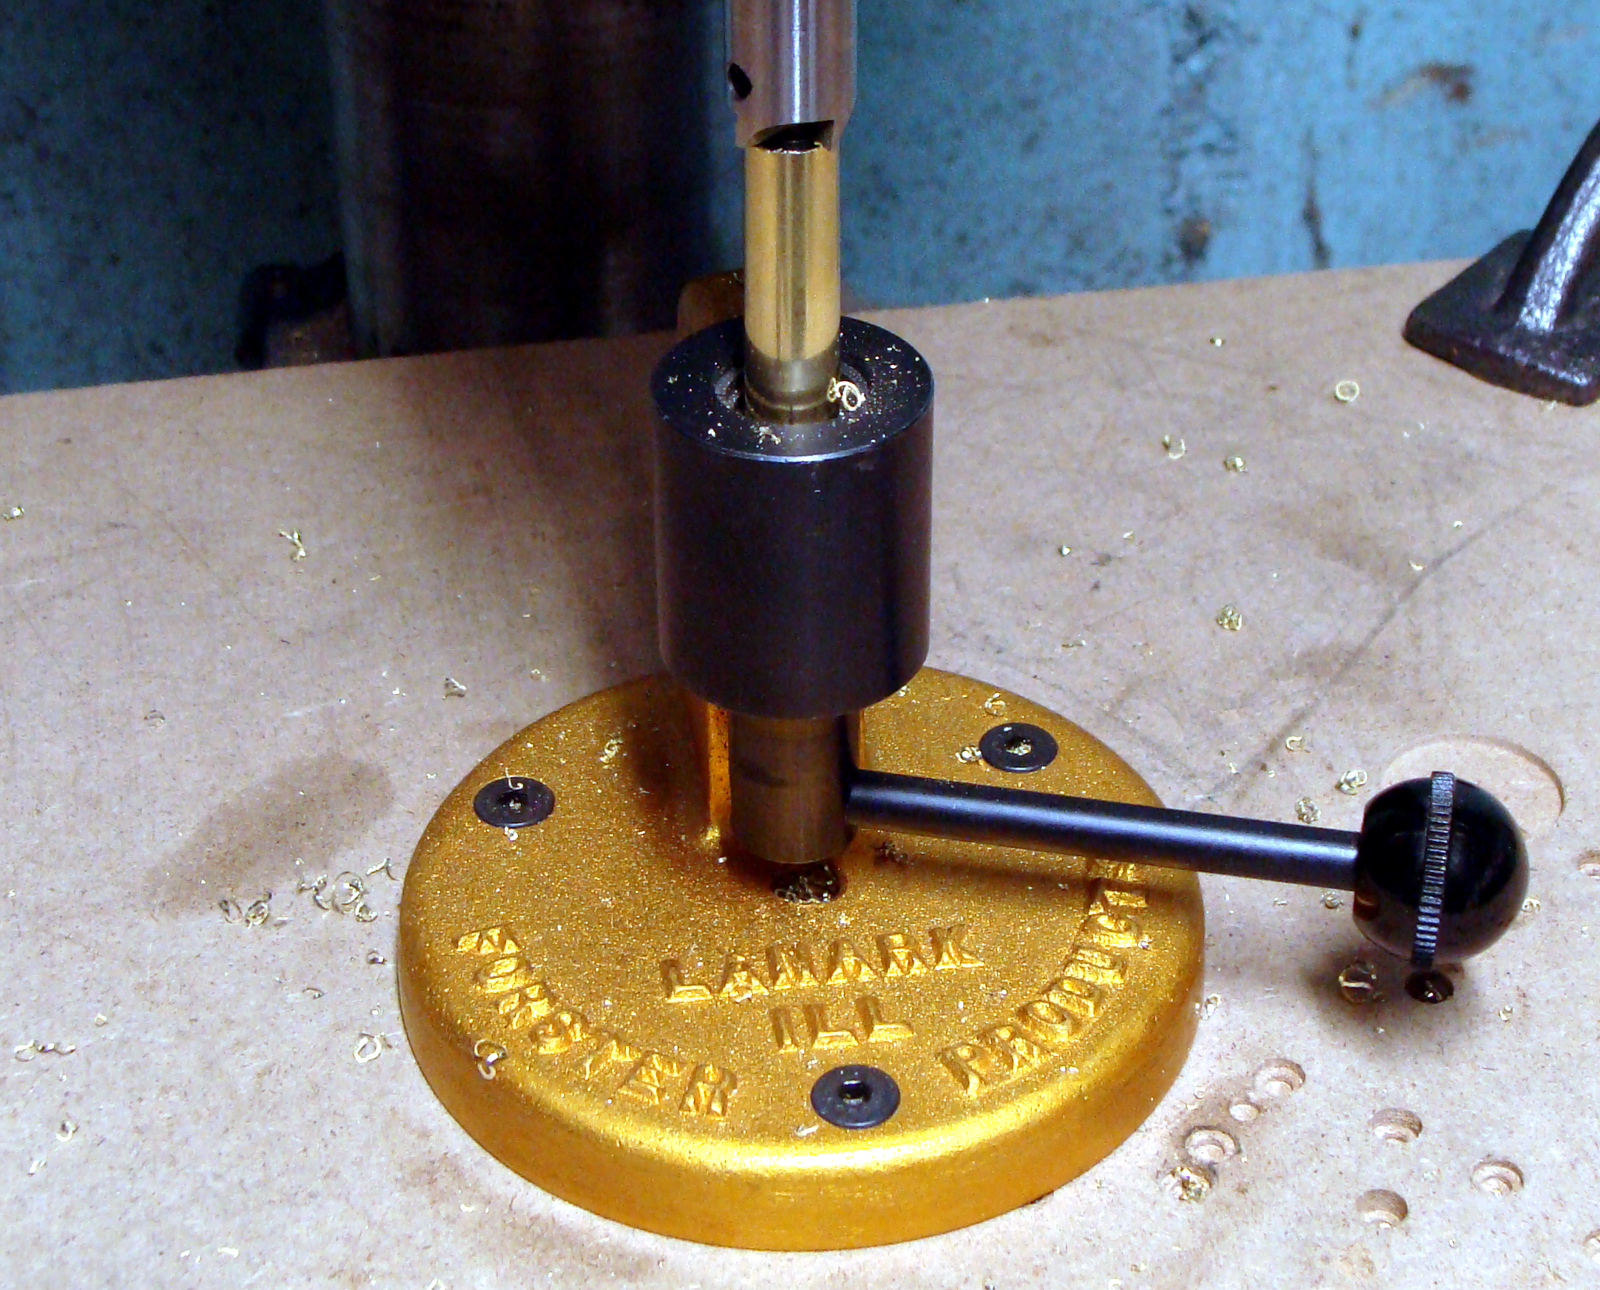
In spite of its name, nothing on this trimmer is "powered". It requires the use of a drill press to run the cutter. The trimmer consists of a base that bolts to the drill press table, interchangeable lever-operated caliber specific collets that install into the base to hold the case by the rim, and a piloted cutter that goes into the drill press chuck. The whole setup costs a total of about $85, and comes with an alignment tool that allows you to center the base directly under the cutter/chuck.
The case length is determined by the stop setting on the drill press spindle. The cutter uses a pilot to center itself in the case. The pilot diameter is caliber-specific, which poses a bit of a problem in this application: We start with a .22 caliber neck, so we must use a .22 caliber pilot, but during the trimming process, we remove the entire neck, shoulder, and part of the case body. At the end of the cut, we would require a .334" diameter pilot to fill up the case and center the cutter.
Unfortunately, it is not feasible to change the pilot mid-way through the cut, so care must be exercised when feeding the cutter into the case. If you go too fast, the cutter can chatter and ruin the case. It takes a little bit of practice to get the feed rate right, but I found it pretty easy to get a good cut with the spindle running at 340 RPM. The collets do an adequate job of holding the case. It wobbles a bit during the cut, but flattens out at the end, and results in a case mouth edge that requires only normal chamfering and deburring prior to loading.
NOTE: When you set the trim length, bear in mind that the necking process during sizing will cause the case to lengthen by a very-consistent 0.008". When you initially set up your trimmer, make sure you trim short by this amount so that you obtain the desired finished length after sizing.
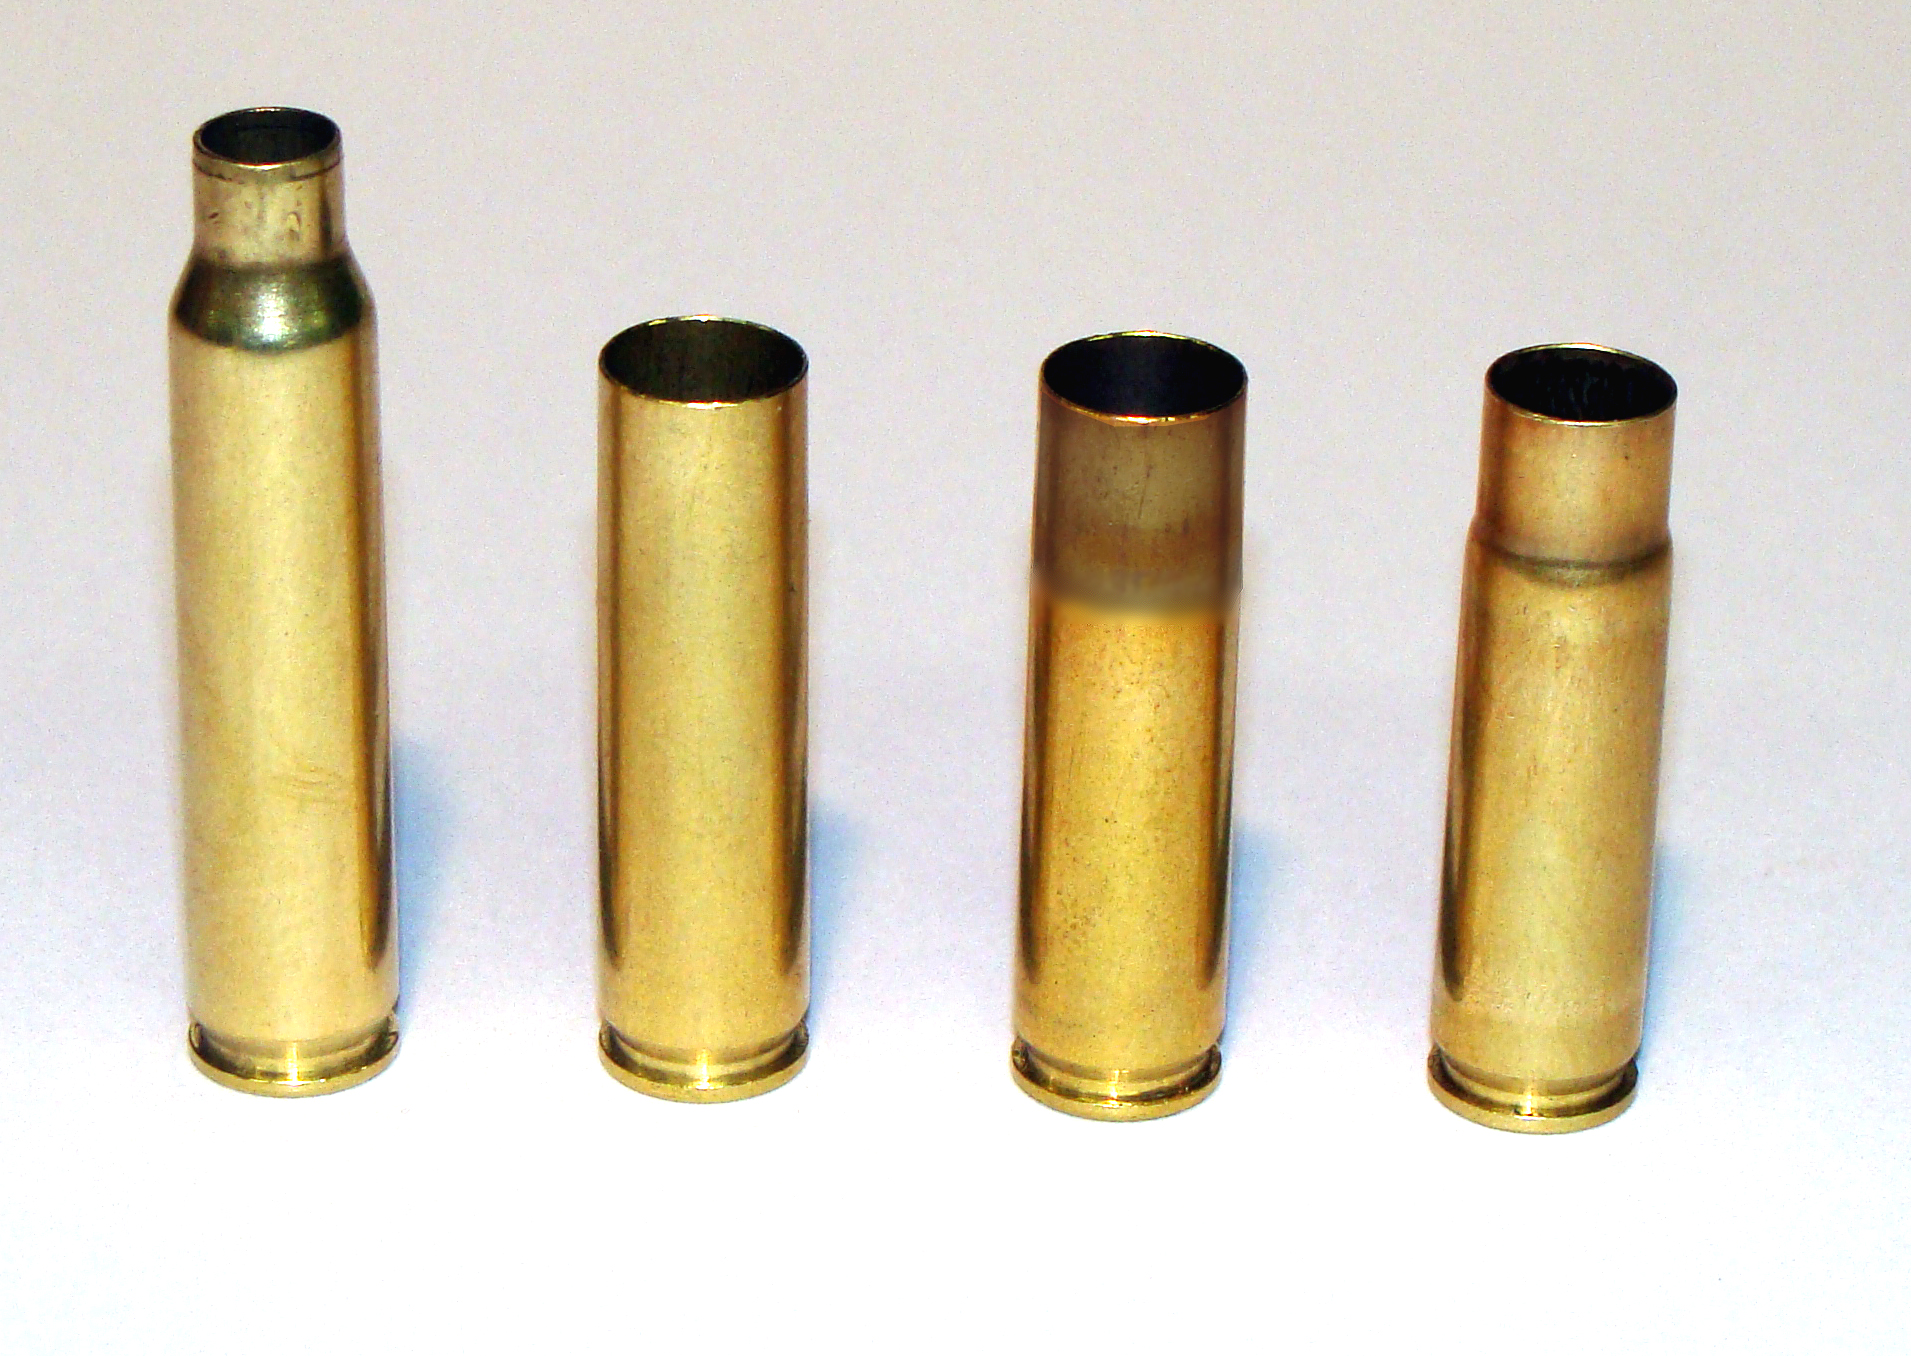
After the trimming process, you're left with a straight-walled, approximately .34-ish caliber rimless case that you will neck down to .30 caliber during the sizing process. However, there's an intermediate step before we get to sizing.
Step 3 - Anneal the case necks
Have you ever noticed the discolored, burnt, faintly 'rainbow' appearance near the neck and shoulder of some military
rifle brass? This is a residual effect of the annealing process. To "anneal" means to "soften". When a case neck
is annealed, some of the hardness and springy-ness is removed from the neck and shoulder area to allow the case to
provide more consistent neck tension, and to better seal the chamber upon firing. This results in more consistent
velocity and better accuracy. Annealing also helps to extend brass life because annealed brass is less brittle and
therefore less apt to split.
Brass is annealed by heating it to a specific temperature for a certain amount of time. Only the neck and shoulder should be annealed. The case head and most of the body must be left hard (un-annealed) in order to withstand the pressure of firing and retain the springy-ness required for easy case extraction.
The proper amount of annealing is achieved by heating the neck to about 800° F for about 6 seconds, while ensuring that the body and case head do not exceed 425 ° F in the process - a process made extra difficult by the relative shortness of the 300 Blackout case. Annealing must be precise and consistent. The old "spin-the-case-on-a-welding-rod-in-a- BernzOmatic-flame-for-a-10-count" method won't cut it.
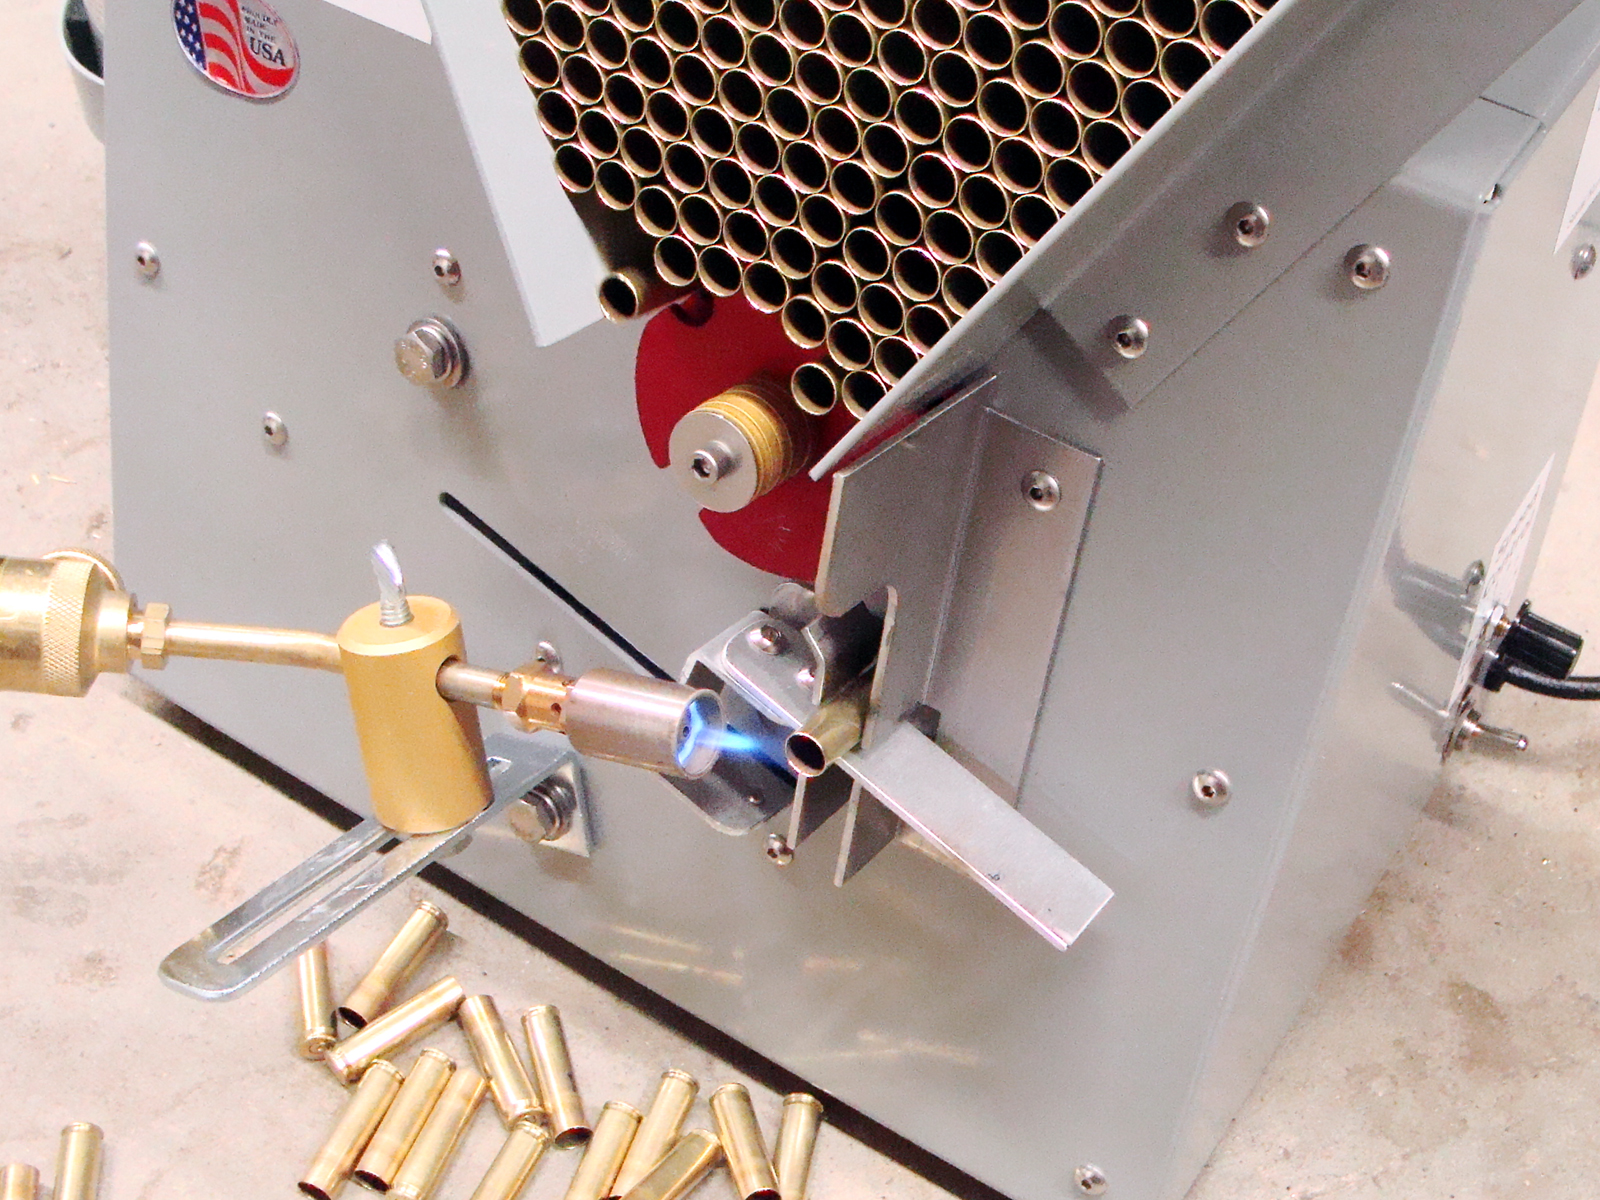
The only commercially available device that I could find that has the ability to maintain the level of consistency needed to properly anneal 300 Blackout cases is the Giraud Case Annealer. This is a precision automated machine that uses a pinpoint propane flame aimed at the case neck, along with a variable speed motor to both rotate the case in front of the flame, and control the amount of time that the case is heated. At $450, the Giraud Annealer isn't cheap, but it is fully automated, easy to set up, and capable of annealing a large number of cases very quickly. I plan to do another article in the future to more completely explain the annealing process, as well as the use of this machine.
You can try skipping the annealing step, but if you have problems with inconsistent velocity, poor accuracy, and short case life, annealing may be the only fix. If the price of an automated annealer is too prohibitive, try to find another reloader to go in on it with you. I did.
Step 4 - Size the Cases
The sizing process is simple: Just run the trimmed and annealed cases through a regular .300 Blackout sizing die. No
intermediate steps or special case forming dies are needed. A good lanolin-based case lube such as Imperial Sizing
Die Wax will help the forming process the first time through, however, I was able to size the cases in a Rockchucker
with a light coating of the Dillon pump spray lube.
A trip though the tumbler after sizing will remove the lube. If you let them tumble for a bit longer, you'll remove the discoloration caused by annealing. This isn't a requirement, but some reloaders prefer extra shiny brass.
Step 5 - Finish Trim (optional)
If you used a cutoff saw to initially shorten the case, a final trimming step will be required to both clean up the case mouth
and to uniform the length of the cases. This step isn't necessary if you used a trimmer such as a Dillon Rapid Trim, the
Forster, or some other drill press mounted trimmer.
Final thoughts
Many shooters buy a .300 Blackout upper to add versatility to their existing 5.56 AR-15. As stated earlier, one
benefit is that you can use the same magazines with both calibers. Technically speaking, you can use the same bolt
too, but it's not a good idea to do so. There's a saying about the AR-15: "New barrel, new bolt". Because the
bolt and barrel wear and break in together, you should always use a new bolt with any new AR-15 barrel, and not use
a bolt with more than one barrel. If you're going to get an "extra" 300 Blackout upper, get a new dedicated bolt
or entire bolt/bolt carrier assembly to use with it.