The previous article was a product review for a fairly expensive piece of equipment (the Giraud trimmer). Many reloaders consider such a device to be a luxury and beyond their budget. This article is a series of mini-reviews of five relatively inexpensive items that I've found to be wildly useful.
Hornady Locking Rings
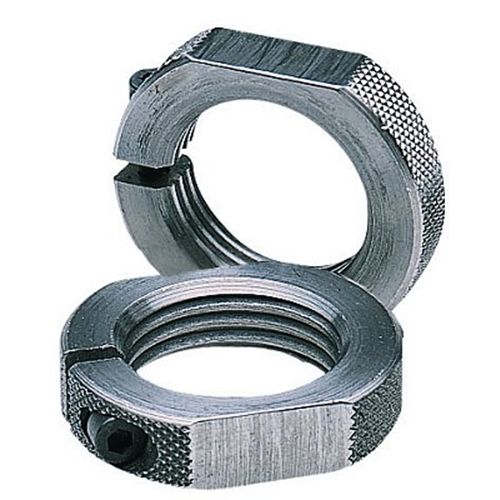
There seems to be something wrong with most of the locking nuts that come with reloading dies. Lee uses rubber O-rings under the nuts, which do not provide a solid stop when re-installing the die in the press, forcing you to readjust the die every time. The brass set screws in the RCBS lock nuts strip easily, and somehow manage to mess up the steel threads. The Lyman and Redding locking rings have no wrench flats, so if you get one of them too tight, you need to get a pair of pliers onto it to remove the die (easier said than done when the die is one of 4 in a progressive toolhead).
Hornady's Sure-Loc Die Locking rings are the best of the bunch. They're steel, have wrench flats, and clamp solidly onto the die without marring the threads. Hornady also sells an inexpensive stamped steel wrench that will fit onto the locking rings even when they're in a densely packed progressive toolhead.
Cost - About $3 each, available from any online reloading equipment supplier
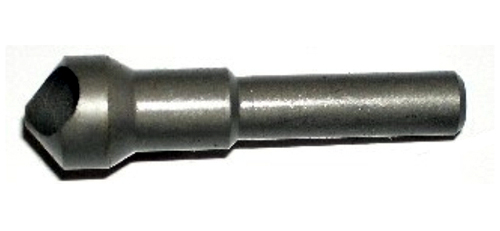
Weldon Deburring Bit
If you reload .223 or .308, chances are good that at one time or another you've had to deal with military brass with crimped primer pockets. Some reloaders shun military brass because it requires an extra case preparation step. Others (like me) consider themselves fortunate when they find crimped military brass because if the crimp is present you can be sure that the brass is only once-fired. Love it or hate it, before you reload military brass, you have to get rid of the crimp.
There are a number of products available that are specifically designed to remove the primer pocket crimp. I've used most of them and found them all to be lacking in one way or another. The bench mounted devices are expensive and require adjustment when working with unsorted cases, the kits that mount in a single stage press do not fully remove the crimp (making the cases difficult to prime on a progressive press) and also require adjustment. The trimmer-mounted cutters are so slow that the College of Cardinals can elect a new Pope in less time than it will take you to decrimp 1000 cases.
The best solution I've found is an inexpensive deburring bit (it looks like a countersink bit but the cutting angle is 90° instead of 82°). The bit is the Model DB-14 made by Weldon. It will remove the crimp from both small and large primer pockets. To use it, chuck it into a drill press, swing the table out of the way, run it at low speed, and simply touch each primer pocket to the bit for about a second. It has only a single cutting edge so it won't chatter, and it's difficult to accidently remove too much material. If you don't have a drill press, you can use it in a power drill clamped to the bench.
Cost - About $10, available from Amazon.com and many online metalworking tool suppliers.
Dillon Primer Pick-up Tubes
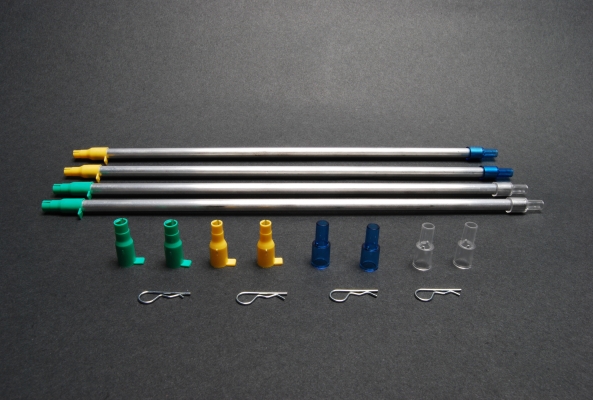
My first two progressive presses were a Star and a Hornady L-N-L, both of which came with primer pick-up tubes (one each for small and large primers). Primer pick-up tubes are used in conjunction with a primer flip tray to take 100 primers from their original packaging, orient them with the proper side facing up, and get them into the feed tube on a progressive press. You dump the primers into the flip tray, get them all facing anvil-down, then poke the pick-up tube onto them one-at-a-time until they fill the tube. Then you simply place the pick-up tube upside down onto the top of the progressive press's primer feed tube, and pull the spring pin on the pickup tube to release the primers into the feed tube on the press. It should be simple, right? It wasn't.
The Star pickup tubes were brass tubes with a slot cut into one end. The slotted end was squeezed together slightly to allow the tip to pick up and hold the primers using friction. Maybe my tubes were work hardened or worn out, but I could never get the correct tension on the tip. It would either be too tight, requiring excessive force the get primers into the tube, or too loose and the tube would suddenly release all of the primers back onto the flip tray - usually when there were about 100 in the tube. The Hornady tubes weren't much better. They have a plastic tip that is very stiff. It took a lot of force to pick up the primers, and a hard push with a small dowel to free up the last two primers when it was time to fill the press.
I wanted to get a bunch of extra pickup tubes that I could fill ahead of time so that I wouldn't have to stop every 100 rounds to fill up a new tube, so I thought I'd give the Dillon version a try. What a godsend! The plastic tips on the Dillon tubes have just enough tension to hold the primers securely, while requiring a minimum of effort to poke the primers into the tube. The plastic tips can be easily replaced should they ever wear out. I haven't even looked at any other brand since I started using the Dillon pickup tubes.
Cost - About $6 each in quantities of 4, available from DillonPrecision.com
Gladiator Tracks and Bins
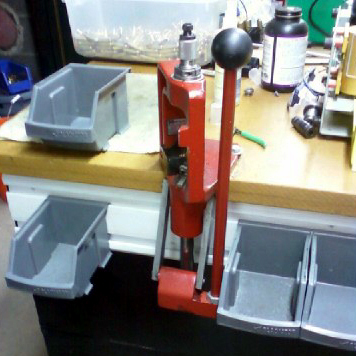
When reloading, you're constantly dealing with large numbers of small items. Bullets, cases, gas checks, primers, and even tools have to be kept organized and most importantly - handy. There's nothing that breaks your rhythm quicker than hunting around for an Allen wrench or knocking over a coffee can full of bullets. I reload on a small island-style bench, with presses and equipment mounted on three sides of the bench (the fourth side is drawers). With four presses, a scale, and a trimmer, bench top space is at a premium.
On the apron of my bench, I added Gladiator Gear Track plastic rails on three sides. The tracks allow the temporary mounting of a number of different accessories, the most useful of which are the plastic bins. They're very handy when doing almost any reloading operation. I use them to hold bullets, cases, and tools. The bins lift in and out easily, and won't fall out once they're in place. They are free to slide side-to-side in the tracks, so you can put them right where you need them. I even position them to catch the finished rounds as they drop from my progressive presses.
The bins feature ‘feet' that make them very steady on the bench top, and allows you to stack them when they're out of the rails. Other track-mounted accessories such as wire shelves and baskets are also available.
Cost - About $12 for a 4' track, bins are $25 for 6. Available from Sears
RCBS Universal Decapping Die
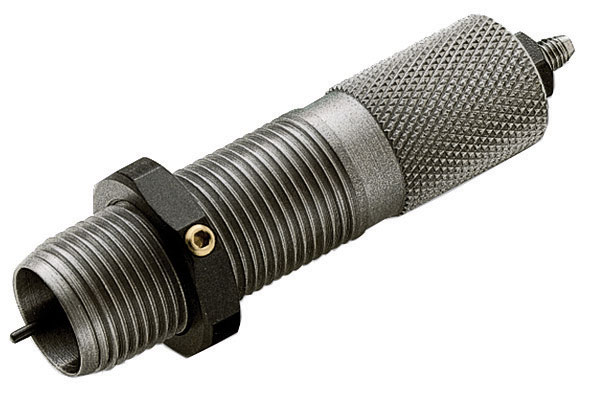
Aside from the obvious uses, a universal decapping die is almost a necessity if you prep your bottleneck rifle cases on a single stage and load them on a progressive press. Often, the last preparation step before loading the rounds on a progressive is to tumble the brass to remove the sizing lube. Depending on what you use for media, cases may come out of the tumbler with particles of media stuck in the flash holes. The flash holes should be cleaned out before you load the brass. You can do it manually, but there is a much better way to do it that does not add an extra step. Simply install the universal decapping die in the first station of your progressive press (where the sizing die normally goes), and the die will poke any stray media out of the flash hole.
I prefer the RCBS decapping die to the less expensive version from Lee. The decapping pin on the Lee die has a sharp edge that can catch on (and dent) the mouth of small caliber cases like the .223 Remington or .204 Ruger. If you use a Lee die, it's a good idea to round over the sharp edge of the decapping pin with a grinder or Dremel tool.