Product Review: Trim-It II (3-Way Trimmer)
If you were to ask a room full of reloaders to name their most dreaded reloading task, the winner by a landslide would be "case trimming". The process of trimming bottleneck rifle cases is time consuming, blister inducing work; but absolutely necessary if you want to make safe and accurate handloads.
Over time, as with many unpopular manual tasks, enterprising souls have created a huge number of gadgets intended to make the process faster and easier. Some devices work better than others, and in my opinion, nobody has yet created the "perfect" trimmer, but the new Trim-It II from Act Tactical comes pretty darn close.
So… What exactly is the "perfect" trimmer?
The perfect case trimmer would be fast, accurate, easy to adjust, would allow for quick caliber changes, and be inexpensive. Until recently, I had been doing all of my high-volume trimming using the Giraud Power Trimmer (which I reviewed a couple of years ago). The Giraud is a great machine, but at over $450, it is not exactly inexpensive. Also, each additional caliber requires a case holder ($35) and cutterhead ($45). You can skip the additional cutterhead if you don't mind resetting the cutting blade when changing calibers; however this is a fussy task, which makes many reloaders opt for the additional cutterheads.
The Trim-It II (3-Way Trimmer)
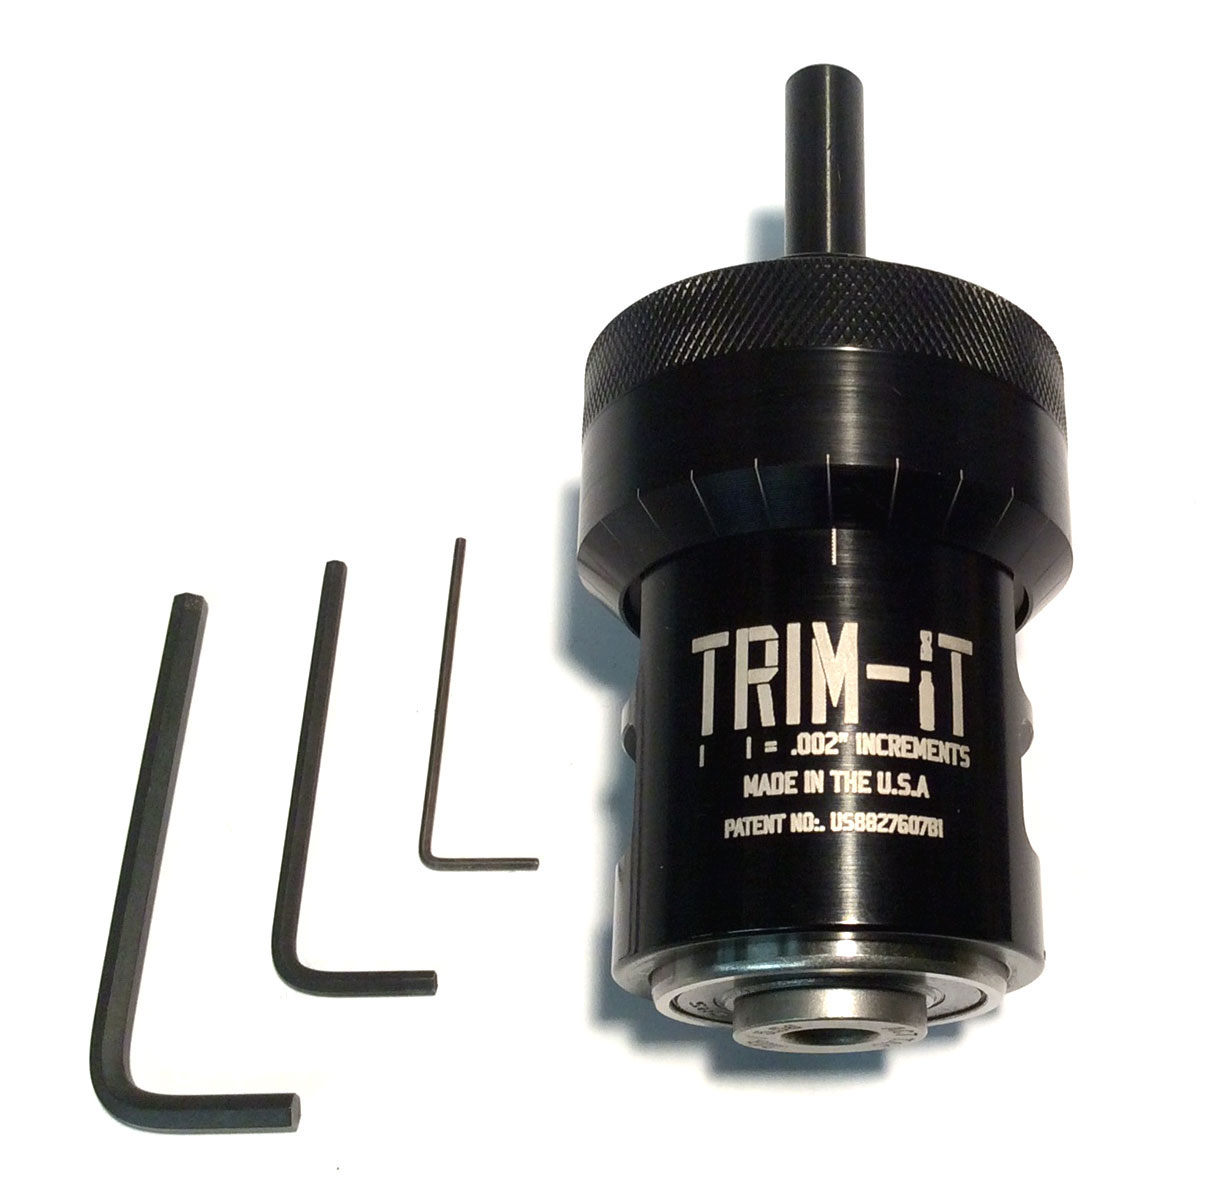
I recently got my hands on a Trim It II trimmer from Act Tactical in Paramount, CA. (See Figure 1). It's called a "3-way" trimmer because it trims the case to length, chamfers the inside, and deburrs the outside of the neck in a single operation. This differentiates it from the original Trim-It which cut the case mouths flat with an end mill, and required a separate manual chamfer/deburring step. The list price for the Trim-It II is $132.50, and caliber dies cost just under $20 each.
The Trim-It II is not supplied with a motor - it is intended to be operated by a user-supplied drill press or hand drill. You could also run it off an electric motor with the proper coupling or chuck. The unit comes complete with Allen wrenches to fit all of its set screws.
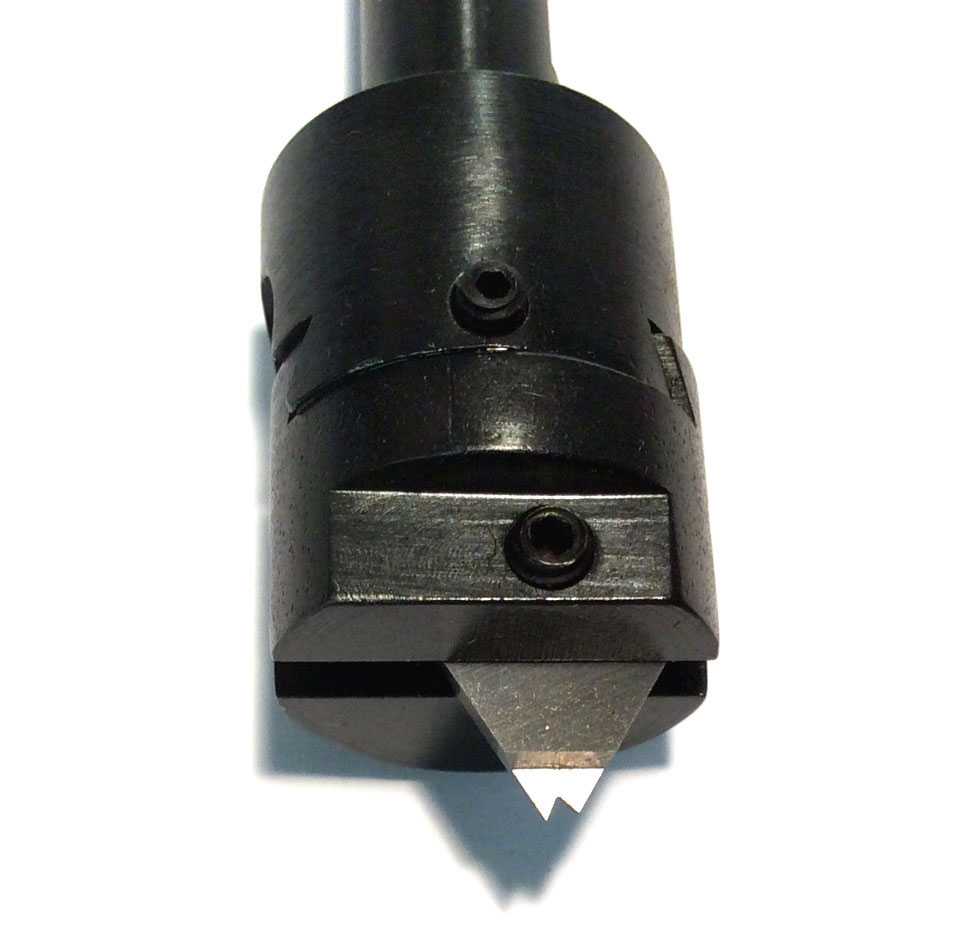
It features a triangular-shaped adjustable carbide blade with three cutting edges. Each cutting edge trims the case, chamfers the inside of the neck at 15 degrees, and deburrs the outside at 45 degrees (see Figure 2). If one edge should ever wear out, the blade can be rotated to use one of the two remaining cutting edges. The mandrel that holds the cutter is made of steel, and the body of the trimmer is machined from aluminum and anodized black.
There are caliber specific inserts that the manufacturer calls "caliber dies". The caliber dies (see Figure 3) consist of a bearing with an insert that features a case neck sized hole, and an angled portion that matches the case shoulder. The caliber die is held into the bottom of the trimmer with a set screw, and the fit between the die and trimmer body is very precise. The caliber dies are sold separately for about $20 each, and are available in 32 different bottleneck calibers. The Trim-It II cannot trim straight-walled cases (not that you really need to). The manufacturer indicates that if they don't have a die in the caliber you need, they will make it.

Initial Setup
Setup is pretty straightforward. First, install the proper caliber die into the bottom of the unit, and tighten the set screw to hold it in place. Loosen the locking screw that holds the shaft of the mandrel into the trimmer and temporarily pull the mandrel assembly toward the top of the unit out of the way. Insert a sized case into the bottom of the caliber die and then slide the mandrel back toward the case until the cutting edge contacts the case mouth. The V-notch in the cutter should straddle the edge of the case mouth so that the long side of the cutter is on the inside of the case, and the short (45 degree ) side is on the outside of the neck (see Figure 4). If not, the cut diameter needs to be adjusted.

Adjusting the Cut Diameter
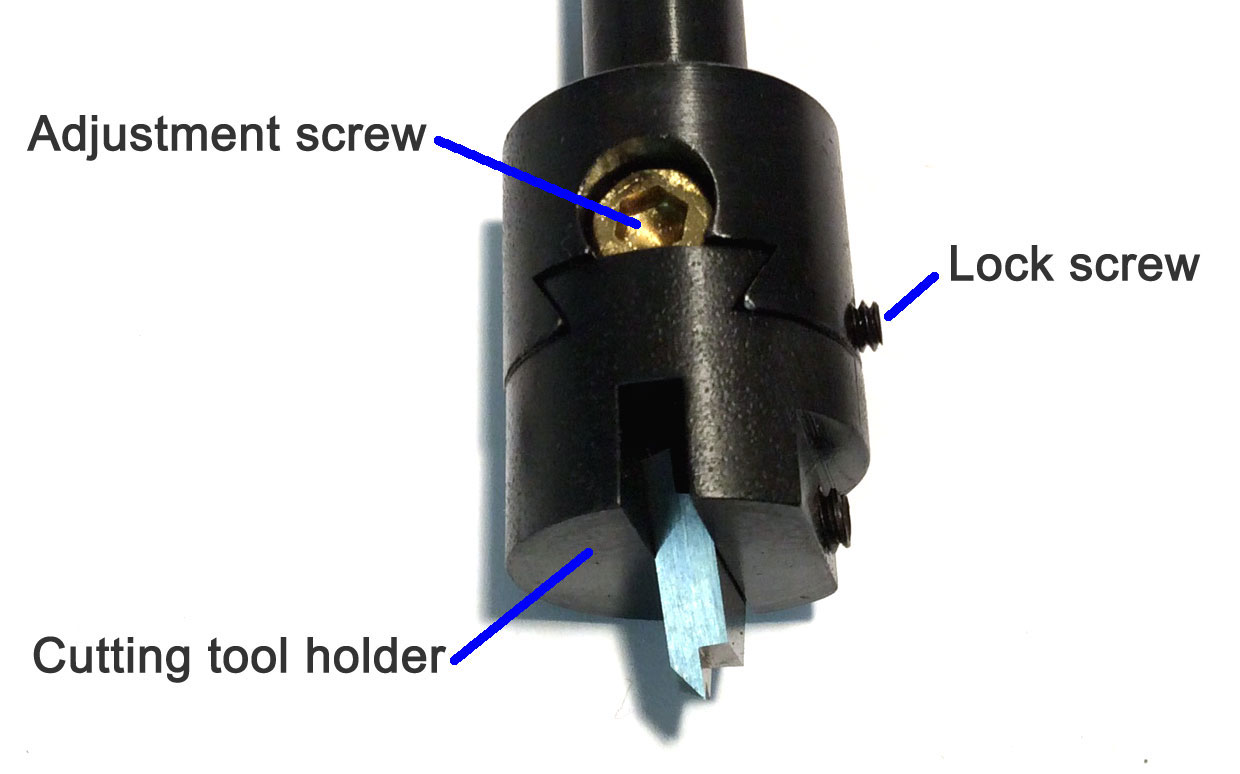
The cut diameter needs to be adjusted when you first set up the trimmer, or whenever you change calibers. The mechanism to make this adjustment is shown in Figures 5 and 6, and is the most innovative part of this trimmer. Instead of simply fitting into a slot in the mandrel, the cutting blade of the Trim-It II is mounted into a separate (moveable) cutting tool holder. This cutting tool holder is dovetailed into the bottom of the mandrel. The mandrel has an adjusting screw that when turned, slides the cutting tool holder assembly, which changes the cut diameter (clockwise to decrease the cut diameter and counterclockwise to increase it).
To adjust the cut diameter, first loosen the locking screw, then turn the adjustment screw until the blade aligns with the case mouth as shown in Figure 4; and then tighten the locking screw. Figures 4, 5, and 6 show the mandrel assembly removed from the trimmer, but this adjustment can also be made with the trimmer fully assembled.

Setting the Case Trim Length
Once the cut diameter is set, verify that all of the set screws on the unit are tight, and install the trimmer into a drill press or hand drill. Turn on the drill, insert a sized case into the caliber die until it contacts the cutter, and hold it there until the cutter stops cutting. Verify that the inside of the case mouth is properly chamfered, and the outside is properly deburred before making any final adjustments for case trim length. If not, adjust the cut diameter until the chamfer/deburr is correct.
Measure the case length with a dial caliper. To adjust the trim length, first locate the witness mark on the trimmer housing (it's the line above the "M" in Figure 1) and note its position with respect to the graduation lines on the top part of the trimmer. Loosen the set screw on the main body, and rotate the housing of the trimmer to change the length. Clockwise rotation (looking at the trimmer from the bottom) will decrease (shorten) the trim length, counterclockwise will lengthen it.
Each graduation on the body represents a 0.002" change of case length, so you can quickly set the proper trim length by comparing the length of your test case to the desired "trim-to" length, and rotating the trimmer body past the appropriate number of graduations.
Check all of the set screws for tightness, run another sized case to check your adjustments, and you're ready to trim.
Using the Trimmer
Using the Trim-It II is as simple as using an electric pencil sharpener. With the unit chucked up into the drill or drill press, just leave it running, insert each case in the bottom of the caliber die, and hold the case mouth against the cutter until you feel it stop cutting. You can experiment with the speed. I ran it at 600 RPM and it worked fine.
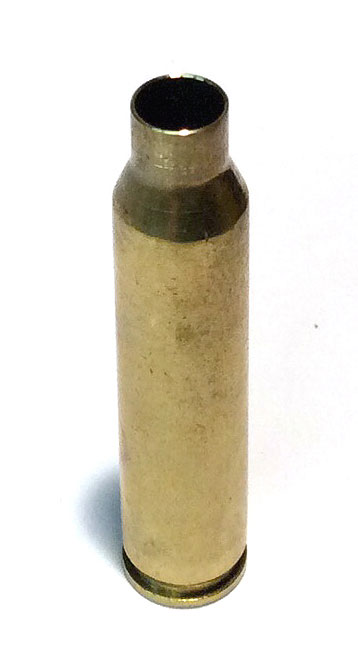
Keep in mind that this device indexes off of the case shoulder, so your trimming accuracy will be as precise as the headspace length of your sized cases. In my testing, I trimmed 50 new Hornady cases and a few dozen once-fired Radway Green cases, and the accuracy was within +/-0.001". The trimmer makes an excellent quality cut (see Figure 6).
Summary
I love this thing. It's fairly fast and every bit as accurate as the Giraud. It is much easier to set up than the Giraud trimmer because of the way you can use the adjustment screw to set the cut diameter, allowing you to make small, very precise changes. Caliber changes are so easy enough that I might never use a manual trimmer again - even if I only need to trim a few dozen cases - and at less than $20 per caliber, I can afford to.
The only minor drawback I found while using it is that unlike the Giraud, there's no means by which the brass chips generated from the trimming operation are contained within the trimmer. They just fall out of it while you're using it.
It's not quite as fast as the Giraud, but this has more to do with the way I was using it than the trimmer itself. With the unit installed in a drill press, you need to insert the cases from below, which is a little more awkward (and slower) than if the cases could be inserted from above.
In the future, I might use a motor with a coupling to run this instead of the drill press. I could then put it in an enclosure so I could run it on the bench top with the caliber die facing up, and possibly come up with a way to collect the brass shavings as well. If I do, I'll include a picture in a future article.